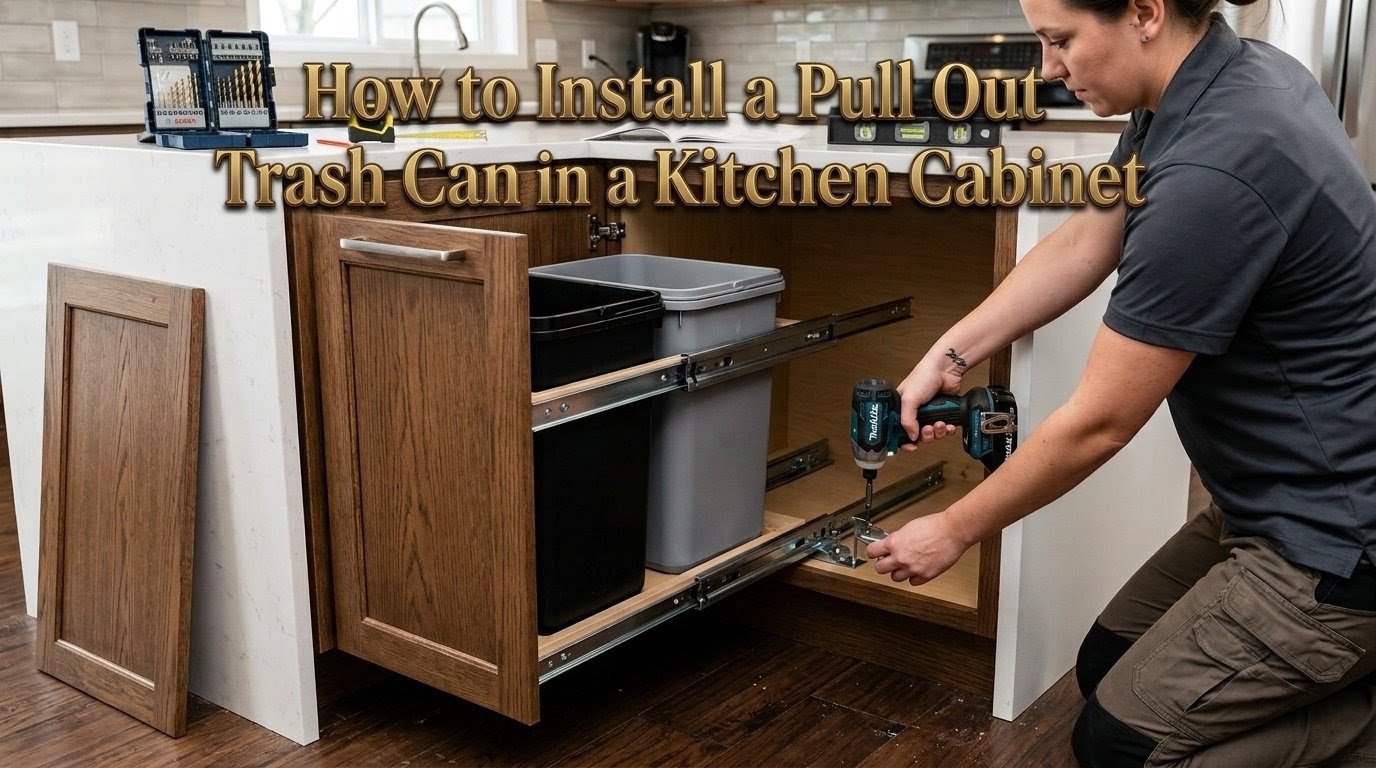
Installing a pull out trash can in a kitchen cabinet looks intimidating until you actually do it. The whole job takes about 30 to 45 minutes with a drill, a pencil, and a screwdriver. The hard part is not the installation, it’s buying the right kit for your exact cabinet before you start.
Most guides skip the measurement step or gloss over it with “just measure your space.” That advice causes more kit returns than anything else in this category. This guide covers measurements first, then walks through every installation step with real numbers.
Disclosure: This post may contain affiliate links. If you buy through these links, I may earn a small commission at no extra cost to you. As an Amazon Associate, I earn from qualifying purchases.
Before You Buy: Measure Your Cabinet Opening First
This step determines which kit fits. Skip it and you will likely be returning the unit and starting over.
The Three Numbers That Matter
Interior opening width is the distance between the inside faces of the cabinet walls, not the exterior cabinet width. A standard 18-inch base cabinet has roughly 14.5 to 15 inches of usable interior width after accounting for the wall thickness on each side.
Rev-A-Shelf’s double-bin kits for 18-inch cabinets require a minimum opening of 15 inches. Their kits for 15-inch cabinets require a minimum of 11 to 12 inches. Always measure the inside, not the outside.
Interior depth runs from the front edge of the cabinet opening to the back wall. Standard base cabinets are 23.5 to 24 inches deep inside. Most pull out kits are 22 to 22.75 inches deep, which fits with room to spare.
The exception is under-sink cabinets, plumbing pipes often eat into 4 to 8 inches of usable depth. If you’re installing under the sink, measure the clear depth between the door face and whatever plumbing you’re working around.
Cabinet opening height is the distance from the cabinet floor to the underside of the countertop or the bottom of any drawer above the door. For a full-height base cabinet door, this is typically 20 to 22 inches. For a door-and-drawer configuration, where a small drawer sits above the main door, the opening can drop to 16 to 18 inches.
Rev-A-Shelf’s double 35-quart top-mount kit (model 4WCTM-18BBSCDM2) needs a minimum height of 18.35 inches. A 50-quart single bin needs more. Know your height before ordering anything larger.
Face Frame vs. Frameless Cabinets
Face frame cabinets, the most common style in American kitchens, have a solid wood frame around the cabinet opening. That frame reduces the usable interior width by 0.75 to 1.5 inches per side. Frameless (European-style) cabinets have no frame, so the interior width equals the full inner dimension.
Both types accept pull out trash kits, but the minimum opening requirements listed on the box apply to face frame cabinets specifically. If you have frameless cabinets, you may have a few extra inches of width to work with.
Matching the Kit to the Measurement
Here’s what the numbers translate to in practice:
| Cabinet Opening Width | Kit Configuration |
| 11 to 12 inches minimum | Single 35-quart bin |
| 15 inches minimum | Double 35-quart bins |
| 18 inches minimum | Double 35-quart or single 50-quart bin |
Rev-A-Shelf and Knape & Vogt both publish minimum opening width requirements on every product listing. Use those specs, not the exterior cabinet size printed on the box.
What You Need Before You Start
Gather these before pulling the cabinet door off its hinges.
Tools:
- Cordless drill with a Phillips bit
- Drill bit slightly smaller than your screw diameter (for pilot holes)
- Tape measure
- Pencil
- Level
- Flathead and Phillips screwdrivers
Materials:
- The pull out trash can kit (bins usually included; lids sold separately)
- Wood shims if your cabinet has a lip at the front edge inside
Most kits include the frame, slides, bins, door-mount brackets, and mounting hardware. Lids are almost always sold separately. Rev-A-Shelf offers compatible lids for their 4WC series as an add-on.
If you haven’t buy a pull out trash can yet, check out our list for the best pull out trash cans for kitchen cabinets.
How to Install a Pull Out Trash Can: Step by Step
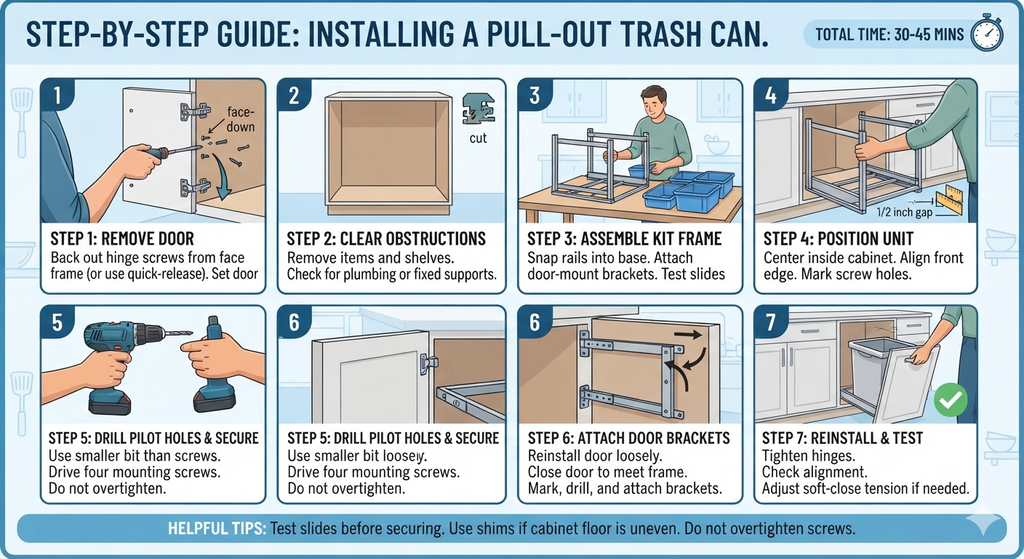
This process applies to the most common kit type: a door-mount bottom or top-mount system that attaches to the cabinet floor and the existing door. Total time: 30 to 45 minutes.
Step 1: Remove the Cabinet Door
Use a screwdriver or drill to back out the hinge screws from the cabinet face frame, not from the door side. Lift the door free and set it face-down on a soft surface. Keep the screws together so nothing gets lost.
Some hinges have a quick-release clip. Press the clip and the door lifts straight off without removing any screws. Check your hinge type before reaching for the drill.
Step 2: Clear the Cabinet and Check for Obstructions
Remove everything inside the cabinet. If there’s a removable shelf, pull it out. If the shelf is built in or has a fixed support, check whether the pull out frame clears it when fully extended. Built-in shelves that block the path need to come out, a jigsaw or oscillating tool cuts through a fixed shelf in a few minutes.
Under-sink cabinets: look at where the drain pipe and supply lines run before you place the unit. Some kits mount to the side wall instead of the floor specifically to accommodate plumbing that cuts through the center.
Step 3: Assemble the Kit Frame
Most pull out kits ship fully or partially assembled. Follow the manufacturer’s sequence, typically this means snapping the frame rails into the base, attaching the door-mount bracket arms, and dropping the bins into the frame. Do this outside the cabinet where you have room to work.
One thing most installation guides skip: test the soft-close or ball-bearing slides before the kit goes into the cabinet. Pull the frame in and out several times. If anything binds or feels stiff, identify it now rather than after four screws are in the cabinet floor.
Step 4: Position the Unit Inside the Cabinet
Slide the assembled frame into the cabinet. Center it side to side with equal clearance on both sides, a half-inch gap on each side is adequate for smooth operation. Slide it fully in and check that the front of the frame aligns with the front edge of the cabinet opening. Mark the screw hole positions on the cabinet floor with a pencil.
If your cabinet has a face frame lip, a slight ridge at the inside front edge of the opening, the kit base will sit raised at the front. Use a wood shim under the back of the base to level it. An unlevel frame causes the bins to roll forward when the unit is opened, which gets annoying quickly.
Step 5: Drill Pilot Holes and Secure the Frame
Remove the frame and drill pilot holes at your pencil marks. Use a bit one size smaller than the included screws. Pilot holes prevent the cabinet floor from splitting, especially in particleboard or MDF construction, which is most common in stock and semi-custom cabinets.
Slide the frame back in. Drive the four mounting screws through the base into the pilot holes. Snug them firmly but don’t overtighten, overtightening strips particleboard fast and leaves you with nothing for the screw to grip.
Step 6: Attach the Door-Mount Brackets
The door-mount brackets are the U-shaped or L-shaped clips that connect the cabinet door to the pull out frame. This connection is what makes the door open automatically when you pull the bin out.
Set the cabinet door back in its hinges without fully tightening the hinge screws, leave it a little loose so you can adjust its position. Close the door so it sits flush with the cabinet face. Slide the pull out frame to the closed position so the bracket arms rest against the back face of the door. Mark the bracket screw hole positions on the door with a pencil.
Drill pilot holes in the door at your marks. Attach the brackets with the included screws. Close the door, fully extend the frame, and check alignment. The door should swing open smoothly without dragging the top or bottom edge on the cabinet face frame. If it drags, the 4-way adjustable brackets allow small repositioning adjustments, loosen the bracket screws, shift the bracket, and re-tighten.
Step 7: Reinstall and Test
Tighten the hinge screws fully. Drop the bins into the frame. Open and close the unit 6 to 8 times to check that the slides move freely, the door doesn’t catch, and the frame closes flush every time.
If the soft-close mechanism engages too hard or not at all, most units have a small tension adjustment on the slide mechanism. Rev-A-Shelf BLUMotion undermount slides have an adjustment tab you can press to change the closing speed. Check the manual for your specific model.
The One Thing That Causes Most Failed Installations
Almost every installation problem traces back to the door-mount bracket alignment, not the slides or the frame. The bracket arms need to contact the door at exactly the right height so the door hangs level when attached to the frame. If the brackets are too high or too low, the door will be pulled slightly out of plane with the cabinet face, tight at the top, gapped at the bottom, or the opposite.
The fix is always the same: loosen the door-mount bracket screws, reposition the bracket in small increments (the 4-way adjustment allows roughly 0.5 inches of travel in each direction), and re-tighten. It takes two minutes and solves nearly every door alignment issue without any additional hardware.
Pro tip: Before drilling the door-mount bracket holes permanently, use a clamp or painter’s tape to temporarily hold the door against the bracket arms in the closed position. Open and close the unit three or four times to confirm the alignment before any screws go into the door face.